Technical Library

MOVING XIV: Turned stand assembly

Entire Contents Copyright © 2010 CBH
Next 1K gifBack 1K gif

Beginning stand assembly 28K jpeg

How to set up the Ruckers turned stand…

It’s too much of a juggle right way up—especially if you are working single-handedly—so you’ll find it much easier to setup the Ruckers turned stand upside down.

To begin, identify the two stretchers: The plain top stretcher is slightly shorter, and a simple rectangle in cross-section. The longer bottom stretcher has a moulded top face.

In preparation for their use, remove the washers and nuts from the ends of each stretcher.

Find the large front leg assembly and stand it upside down on the floor.


Note that the outside faces of the leg assemblies have large recesses to house the washers and nuts: The bolts of the stretchers go through the leg assemblies from the side of the small hole.

Remembering that you are working upside down, rest the top stretcher in position on the floor, and insert its bolt through the hole in the front leg assembly.

Fit the washer and nut, and tighten with your stand wrench.

The stand will easily support itself on the floor from this point on.

Stand partly assembled 29K jpeg

Stand partly assembled 25K jpeg

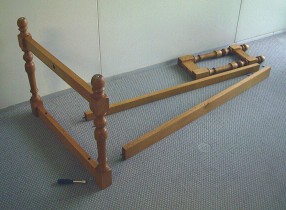
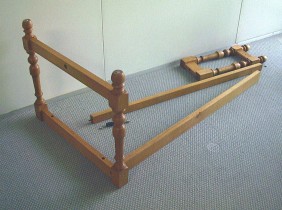
The longer, bottom stretcher diagonally spans the lower rungs of the front and back stand assemblies, with its moulded face on the top. Because you are working upside down for now, its moulding must temporarily face the floor.

The ends of the bottom stretcher are angled, so this piece is not interchangeable end for end. If you use the correct end against the front leg assembly, it will bring the opposite end of that stretcher only a little away from the far end of the top stretcher, suitable to eventually fit the tail leg assembly.

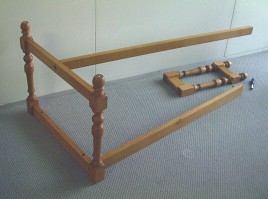
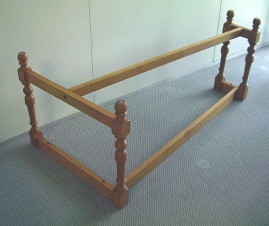
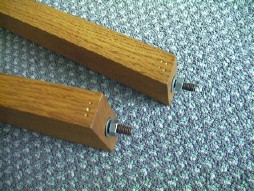
Insert the bolt of the lower stretcher through the hole in middle of the front stand assembly. Fit the washer and nut, and tighten with your stand wrench.


Now you can easily fit the rear stand assembly over the bolts at the tail end of the stand.

Fit the washers and nuts, and tighten with your stand wrench.

Carefully flip the stand over, and you are ready to place your instrument on its legs and unpack it, referring to the page about setting up the instrument.

Stand together 27K jpeg

Stand bolts 35K jpeg

So you don’t have to go hunting for them, when the time comes for you to dismantle the stand for transport always get into the habit of screwing the nuts and washers back on their bolts embedded in the end of each stretcher.


Moving index:


CBH Icon 1K gif Technical Library overview
CBH Icon 1K gif Harpsichords Australia Home Page